NAIL ARTS

Sunday, January 15, 2012

Hands and Feet Arts

Hi everyone,

This is a preview of what's coming up tomorrow. Yup, an obnoxiously bright pink nail polish on my toes and some Angelina Jolie-inspired greige for the manicure. I've been wearing these colors for a week and so far, I'm impressed!


Hands and Feet Arts
Hands and Feet Arts
Hands and Feet Arts
Hands and Feet Arts
Hands and Feet Arts

Saturday, January 14, 2012

Why We Buy Makeup.? My Internet Cant Handle True Blood

Hi everyone,

Yesterday, I was playing with my makeup stash and I've realized how little it has grown since 2011. While my move to Vietnam put a damper to my makeup shopping habit, there is something more to it that makes me not buying makeup as much as I used to. I could not put that idea out of my head and kept on asking myself why I haven't bought makeup anymore. Of course, the love for makeup is still there but why?

About a year before I started makeup blogging, my stash was relatively small. An eyeshadow quad here, a couple of lipsticks there, and probably 5 brushes. I was happy and my mind was not cluttered with the question of what products should I use during my makeup session. And then, I discovered makeup blogs. The result? Makeup hoarding began.

To make it worse (or better, depending on how you look at it!), I decided to open My Makeup Blog. As a makeup blogger, I had to buy makeup, makeup, and more makeup. It was a vicious cycle. I bought things only to use 2-3 times before I lost interest. And they were good products, too. Before I went to Vietnam, I sorted out my stash and donated about 2/3 of it. The stuff I brought home are things I truly love. My must-haves.

Since I came back to Vietnam, I haven't bought more than 20 makeup items. To think about it, when I started wearing makeup back in 2001-2002, I probably bought that much makeup during a month. Or even in 2 weeks if Ride Aid had sales.

To come back with our original question- why do we buy makeup- I have a few answers:

1. The novelty effect

Every season, makeup companies roll out with new products to entice us. New colors, new textures, new scents, new packaging. And guess what we do? We buy the new stuff and forget the old ones that are still full in our makeup drawers.

If you notice, some makeup companies like MAC come out with new limited edition collections very frequently. MAC is notorious for it up to a point I got sick and tired of their new LEs. It is hard to keep up with MAC collections anymore and after a year or so of following them, I have come to a conclusion that their regular lineup is just as good. On top of that, they don't have the limited factor that worries me.

2. The sales effect

As a bargain hunter, I love, love, love sales. Sometimes, I could get a whole lot of things for cheap when combined with coupons. However, not all the time the sale items are worth it. Once in a while when I sorted my stash, I had to throw away barely touched items that did not live up to my standards. Yet, I bought them because they were such awesome bargains.

3. The happiness effect

I don't know about you but always, when I have a new makeup item, I feel happier. A new lipstick, eye shadow, blush, or even nail polish put a smile on my face. It does not take much to make me smile because most items I bought these days are affordable.

I guess I am not the only one. Coined by Leonard Lauder, the lipstick effect is an indicator for economic uncertainty and recession. During tough times, lipstick sales go up. Now, even nail polish sales increase in this economy. Lipsticks and nail polishes do not cost as much as a dinner or even a movie ticket. On top of that, you can use them over and over again. Therefore, they have better pay offs in this economy.

My internet can't handle True Blood!


Now, here comes an interesting part: since last Thursday, I was not able to go online at all. My internet decided to quit on me. It was the second time this week and the internet guy began to remember my face.

Guess what happened two days before that? Two friends of mine encouraged me to watch True Blood, starting from the very beginning. So, I went online and watched a few episodes in two days. Ok, I lied. I watched half of season 1 in two days. And then, le internet decided to call it quit!

It was beyond frustration, ok? I was in intense pain. It was like the Internet God was toying with me to lure me into something dirty and raunchy only to yank it away when I was hooked.

So, I called the internet guy again and he came, took a look at my setting, and told me there was nothing he could do. My internet setting was messed up beyond his repair and he needed to call in the crew to fix from the main line. That was Friday evening. Internet was down since Thursday. And there was a weekend without the World Wide Web.

Thankfully, I had books. During the weekend, I managed to polish up a book and started reading half way through another one. Not so bad. But now that le internet is back, I guess I am going to watch True Blood again. This time, sparingly since I know my internet cannot handle half a season of raunchy, dirty, sexy TV in two days.

That's all for Monday. I did Hip Hop Abs earlier today and I felt so good. Week 2 is more intense and I already feel a slimmer waistline. How about you? Do you have any plans for Monday? Also, are you a fan of True Blood?

Happy New Year 2012!

Hi everyone,


Happy New Year!
May 2012 bring exciting opportunities to your life and may your heart be filled with joy and love throughout the year.
Thank you for your continuing support to http://choosingnailart.blogspot.com/  and I hope 2012 is going to be a wonderful year of makeup and beauty blogging to all of us.

Fixed Her Retractable Brush

Hi everyone,


This is my EcoTools retractable kabuki brush which I love very much. Only, there is a tiny problem: the brush is not retractable anymore.


As you can see, the case is separated from the brush and I did not do it purposely. After a few washes, the glue at the bottom of the brush fell off the case and I have been using this brush without the case for a while now. Even in this contouring tutorial, you can see I used the brush by itself. It is ok that way but I want my retractable brush, not a kabuki on a stick!

So far, this is the softest brush I have ever used. There is no way I am going to toss it away. Besides, replacing it is out of the question. So, with a little bit of patience and super glue, I managed to put my brush back together and make it a retractable brush once and for all.

Before I re-glued things together, I washed and dried my brush first. Depending on the weather, this brush can take up to 48 hours to dry and I made sure it dried completely before I proceeded to fix it.

What you need: all the parts of your brush and super glue. It does not matter what brand you use. The dollar store version works just fine. Here, I use the 502 glue, which is the Vietnamese super glue.
Step 1: put the shiny metal part...
...and glide it up. This part is the retractable component of the brush
Step 2: make sure the bottom of the brush as well as the inside of the case is clean. Then, open your super glue...
...then squeeze the super glue to the bottom of the brush without getting any glue into the hole. Also, squeeze the glue to the bottom of the casing
Step 3: quickly, put the brush into the casing and let the glue dry overnight.
DO NOT move or touch the brush while it dries. Doing so will disturb the drying process.
After the glue completely dries, put the cap back on and voila, your retractable brush is retracting again!

Also, super glue is good to glue back your brush once the ferrule is detached from the handle. Just make sure to glue the metal part to the wooden part without touching the brush bristles. Super glue dries fast so don't get it on your skin, either.

Hip-hop Abs update:

Today is day 2 of week 2 and things are getting a lil' intense. I did 2 workouts back to back since the schedule instructed me to do so. Now, as I am typing this, my obliques are sore. Tomorrow is going to be another double workout day and I can't wait for it!

I hope you enjoy this tutorial. Ecotools retractable brush is a really good brush and I am glad to find a way to fix it. How about you? Have you reattached your brush before?

Pink Nail Polish from Odessa

Hi everyone,

I guess I'm one of those people who prefer having a pedicure over a manicure. Most of the time, my fingers are not painted while my toes endure some really interesting colors (but mostly, I prefer red.) Recently, the moon and stars synced up or something because I finally had painted fingers and toes.

The products I used are from Kem Nghia shop, a place where they sell the legendary Nghia cuticle nippers. Both are utterly cheap and after wearing them for a week, I was very happy with the results.

(L-R): Nghia O'Beauty in S019 and a nameless Odessa nail polish which I call "Obnoxiously Pink"
 First stop, let's take a look at the fingers, shall we?


The picture does not do justice to this nail polish at all. While it does look like milk with a couple drops of coffee in the picture, in real life this nail polish has a touch of pink in it. It looks almost like Revlon Pink Suede, y'know, the one Angelina Jolie used to wear. I had Pink Suede before and could not make it work at all. It was too gunky and did not spread evenly. I was so frustrated that I had to return Pink Suede.

However, Nghia O'Beauty S019 works like a charm. Not only does it spread out beautifully, it also requires only one coat. Like the S030 that I reviewed before, this one does not chip during the week that I wore it. By the end, there was some minor tip wear but that was about it.

The price? Less than a dollar! Which makes me want to stop by that shop more frequently to get more nail polishes for me :D

Secondly, the toes:


While Nghia O'Beauty is the house brand of Kem Nghia, Odessa is a product from ATP cosmetics with ingredients imported from France. It is a bit cheaper than Nghia O'Beauty but not so much for me to jump ship. I have two bottles of Odessa and the texture is the same: they are cream nail polishes that can make OPI creams run for their money.

Seriously, this cream nail polish is that good. It is shiny, easy to apply, and most importantly, it lasts and lasts. I applied two coats since the first coat looked really opaque and the shine was almost blinding. The brush is wide and thick that leaves streak-free coats after layering. Usually, I do not like creams because of the streaks. The first layer may look fine but when I put the second layer on, streaks are all over my nails. And this happened when I used OPI creams, no less!

But the only set back I have with Odessa is its drying power. I guess since it is a cream, it does not set as fast as the other one. The trick for not messing it up is to wait for the first coat to dry before applying the second one, then wait for it to dry before applying the top coat. In one of my trials, I was impatient and applied my top coat so fast. Fifteen minutes later, I opened a book and got marks all over my nails!

Last look at my toes and fingers du semaine :D
While I love both colors, the obnoxiously pink nail polish is the one that makes me smile a lot. It is a cheeky nail color. When I wear peep-toe shoes, that hint of pink is a nice surprise for those who manage to take a look at my feet.

Therefore, the tip of the day is: for those of you who work in conservative environment, wear nude colors on your fingers while reserve the bright and cheerful ones for your toes. When you take off your shoes, those bright colors will make you smile.

How to Make Your New Year Fitness Resolution Stick

Hi everyone,

The new year is here and I bet a lot of us are keeping a short list of New Year resolutions. The thing is, by January 15th, a whole bunch of us are dropping out of the race. By March 31st, those who wrote down their New Year resolutions already forget what they are all about.

I know. I've done it so many times that I finally come to realize why my resolutions did not work in the past. The main reason is they are not specific enough. Another reason is the lack of rewards. And last but not least, resolutions need to be reminded and evaluated once in a while, too.

So, in 2012, I am determined to make one of my resolutions work. Yes, it is my fitness resolution. I know a lot of us want to lose those extra pounds and feel more energized. This method I am going to show you came from my 100-day fitness trial that I did last year. It worked for me well and I hope it will work for you as well.

For your fitness resolution, you need 3 things: specific goal, a set of rewards, and accountability. Here is how you do it:

1. Specific goal:

Most people would put their fitness resolution this way: I want to lose weight.

I know, so do I. But the main thing about that one is: it is not specific enough. You want to lose weight but how much do you want to get off your body? How long will it take? And last but not least: How would you do it?

Instead, your specific goal should be like this: I want to lose x (lbs/kg) by doing (insert type of exercise) y days a week for z days.

For example, my fitness resolution would be: I want to lose 30 lbs by doing a blend of exercises including cardio, Pilates, yoga, and weight training 4-5 days a week for most days in 2012.

Then, I would further break down my main goal. For example, I would dedicate January to do Hip-hop abs and as I get stronger, I would go on to P90X and such.

2. Rewards:

I used to put a smiling face on my calendar the day I worked out. At the end of the month, I would marvel at the calendar and be amazed at how many smilies I had. I knew for a month, I was being diligent and I had something to show.

However, as time goes by, things become harder. Sometimes, you need to bribe yourself in order to bring it. It is good to set some goals as you go. For example, after I finish my month-long of Hip-hop abs, I would probably get me a pedicure or a foot massage to celebrate. Then, to motivate myself to finish P90X, I would get something big, maybe a new pair of shoes from Adidas that I always want or a new pair of yoga pants.

Most importantly, your rewards should be in non-food/alcoholic/calorie-filled form. It is not a good advice to celebrate your 90 days of busting your booties with cake. No, not at all. Having a pedicure, massage, facial, or treating yourself to a mini session of retail therapy is more rewarding.

3. Accountability:

In the past, every time I did the new year fitness resolution, I failed simply because I did not acknowledge it. Now, with my blog, Twitter, Facebook, and even Google+, I have so many ways to let people know that I am exercising. Always, I am surprised at the amount of support I receive. Your replies to my exercise updates and tweets always make me feel energized.

Hot Nail Trends For 2012

The New Year is right around the corner but the nail trends that are going to be in style in the coming year are already being worn by women of all ages. The good news is that there’s something for everyone. The bad news is that there’s going to be so much to choose from you won’t know where to begin.

REDS
Source
Whether it’s a true red or a dark wine shade, red is in the forefront of nail polish colors this season. Although it’s gorgeous and sophisticated on its own, you can make it even more personal by doing a red French mani or applying some fun nail art to it.

NUDES
Source
Take inspiration from the seventies and paint your nails in a sultry nude tone. There are dozens of shades to choose from that are more conventional. But if you want to give your color a kick try a metallic nude or add sparkles to your polish.

 METALLICS

Source
Gold, silver, copper and chrome aren’t the only metallic colors were seeing in the streets. Just about any color can be found in a metallic version so go ahead and get creative with your look. Midnight navy in metallic, bordeaux and turquoise are some of my favorites. Get out there and try a few metallic polishes to see which ones you love.

GLITZY 
Source
I don’t know a single girl who doesn’t love sparkly polish and this season you can find more variety than ever before. These polishes are surprisingly easy to apply and remove and have the same lifespan as your average polish. They’re also pleasantly uplifting and great to wear for festive occasions such as the holidays and New Years.

MOON MANICURES

Source
Otherwise known as reverse French manicures this design has been around for a few seasons now and shows no sign of slowing down. Basically you have to draw the moon shape at the top of the nail bed instead of at the tip. Don’t forget to use two colors that pop such as red and purple to really nail down the look. It’s edgy, it’s fun and it’s worth trying out at least once.

LONG AND ROUND

Source
Many women prefer to file their nails down in a square shape but if you’re up to a change try letting your nails grow super long. Once that’s done make them round and add some polish. It’s a look that’s gaining in popularity amongst celebrities such as Adele and Rhianna and it won’t be too long before you start seeing more and more women trying it out in everyday life.

So now all you have to do is decide which one you want to try out first and where you want to go from there. Don’t be afraid to try new things as you may be surprised by what you end up loving. Have fun and stay beautiful.

Saturday, November 5, 2011

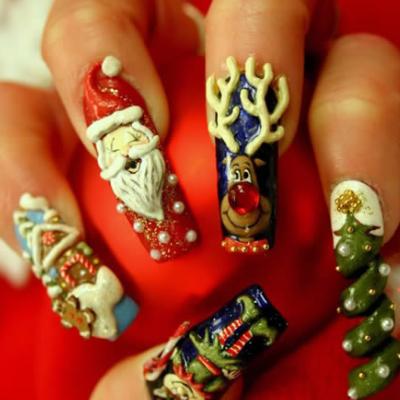
Christmas Nail Art Ideas

12 of the best sites for Christmas design art for your fingernails. Know    another site that should be on this    list? Leave your suggestion at the    bottom of this page. (Related searches: Acrylic Nail Designs,    Christmas Decorations, Christmas Ornaments)

1. Christmas Nail Art by Vicki Irvine - About 15 nail art designs with a    Christmas theme. No advice on how to make them, but good for ideas.

2. Christmas Nail Art at CoolNailsart.com - This nail art community    offers a ton of Christmas-themed nail art photo galleries to give you    ideas, including Christmas nails with a snowman, Christmas tree, candy    cane, Santa and his flying reindeer spread across all 5 nails of a    hand, more.

3. Christmas Nail Art Tutorial Videos at YouTube - You’ll find a handful    of videos here that show you how to make nail art designs including    Christmas trees, a Christmas candle, snowman, and more.

Christmas Nail Art -1
Christmas Nail Art -2
Christmas Nail Art -3
Christmas Nail Art -4
Christmas Nail Art -5
Christmas Nail Art -6
Christmas Nail Art -7
Christmas Nail Art -8
Christmas Nail Art -9
Christmas Nail Art -10
Christmas Nail Art -11
Christmas Nail Art -12
Christmas Nail Art -13
Christmas Nail Art -14
Christmas Nail Art -15
Christmas Nail Art -16
Christmas Nail Art -17
Christmas Nail Art -18
Christmas Nail Art -19
Christmas Nail Art -20
Christmas Nail Art -21
Christmas Nail Art -22


Wednesday, November 2, 2011

Popular Nail Design Arts


Nail designing is the latest craze among girls at the moment. You can make your nails look absolutely fabulous and freaky with the use of nail designing techniques.

Nicely manicured fingers will always look attractive. Manicured fingers will not only look stylish, but they also reflect your sense of personal hygiene.

The designing of nails starts with the cleaning. It is always better to keep your nails clean. Your nails can be cleaned by soaking your fingers in a bowl of warm soap water for 10 to 15 minutes. A small fine brush can be used to remove the dirt from any cracks in the nails. Read the rest of this entry »
Tags: artificial nails, base coats, fragile nails, nail hardeners, nail polishes
Related posts

    * Caring for Your Acrylic Nails
    * Manicured nails at another level
    * Make Your Nails Look Beautiful
    * An Easy Way For Women to Maintain Their Nails
    * Trendy Nails Unlimited – A New Contender in the Pre  
       Designed Nail Tip Market

http://www.simplenaildesigns.com/wp-content/uploads/2011/06/polka-dot-easy-nail-designs.jpg
How to Apply Nail Art Gems

Our hands are one of the busiest parts of our bodies. That is why to pamper it, we give it some treats by relaxing and beautifying it. One way is to do some nail art.

It gives beauty to the hands, not just by adding colors but also putting some accents and art. For now, I will be discussing to you how to put a nail art with gems. It could be quite difficult but I will help you to make it easier.

So before we proceed with the nail art thing, here are some things we need to remember.

You may buy gems from a nail art section in your department stores (if you have one) or you may go to a textile section.

Choose small gems that will fit on your nails and that it can give more space for more gems on one nail. It allows you to be more creative on the design of the nails.

This nail art thing requires lengthy time since it requires many layers for the coating and your favorite colors.

Make sure you are not in haste so that you will not be pressured and you will be given more time to explore your creativity. Read the rest of this entry »
Tags: excess paint, favorite colors, lengthy time, nail art, textile section
Related posts

    * MIXED UP NAILS ACRYLIC
    * Nail Art Trends for Every Season and Reason
    * Nail Care Preparation
    * Gel Nails Art Ideas
    * Kawaii Nail Art


How to Nail an Artistic Scholarship

If you are an artist looking forward to nailing a scholarship to get you a college degree, you must be aware that the competition for artistic scholarships is tight. But with the proper preparation and some savvy, you can enhance your chances of getting a college tuition grant and perhaps graduate college without shelling out a single dime.

The first thing you need to do is scour all possible sources of scholarships. That is, you need to survey your potential sponsors and narrow them down accordingly to your skills as well as your specifications.

Read the rest of this entry »
Tags: arts festivals, college scholarship application, college tuition grants, favorable position, scholarship fund

http://www.rigamode.com/wp-content/uploads/2011/10/creative-nail-art-designs-picture-CNd2-430x362.jpg

Can I Have a Design on Only One Finger? – Simple Nail Designs

Creating simple nail designs is fun, but it can be a lot of work maintaining the beauty of your nails.

Sometimes it’s easier to paint your nails right out of the bottle and keep it going. Fortunately, simplicity meets creativity with this nail design.

Creating simple nail designs on the thumb or ring finger only is gaining popularity.

It allows you to add a bit of interest to your nails. One of the easiest things to do is draw some random lines on top of your nail polish. For a base color, choose red like in the photo or whatever your preference.

Simple nail designs that use black and white lines look best on red, blue, black and pale backgrounds.

You can also choose different colors to draw your lines with, but black and white are popular.

Just make sure to use a nail art brush so that your strokes are nice and thin.

If you do not have a nail art brush, you can use regular nail polish, but be careful that your lines are not too thick.

Read the rest of this entry »
Tags: left hand corner, nail art brush, polish lines, simple nail designs, upper left hand corner
Related posts

    * How do women use rhinestones for nails?
    * The Winter Blues French Nail Manicure
    * Unleashing the Beast – Or the Zebra Within! Simple Nail 
       Designs
    * The Winter Blues French Nail Manicure – Simple Nail Designs
    * Simple Nail Art for Cold Weather

http://www.thenailart.com/prodimages/m61_designs.jpg

Cute, Simple Nail Designs: Striped Bow Tie


If you are looking for cute, simple nail designs, look no further. If you enjoy striped nails, then you are in for a treat. The artist took striped nails to the next level by adding a cute bow tie on each of her thumbs. The best part about this look is that you can re-create it without any fancy tools. The only thing you need are different colors of nail polish: black white and blue. Want to make this nail design even more formal? You can substitute the blue background for blue instead.

    * As you can see in the photo, the base color is blue. So, paint
       all of your nails with a rich blue color.
    * The next thing you want to do is draw thick black and white stripes across the top of each of your nails. Because you don’t want the black and white to mix. You should start with one color first and wait for it to dry before using the second color. For example, draw two white stripes on each nail. Let dry. Then go back and add your black stripes. Another option is to paint the top half- of your nail all white. Then go back and add two black stripes. Read the rest of this entry »

Tags: black nail, fancy tools, nail art brush, simple nail designs, white stripes

Related posts

    * The Winter Blues French Nail Manicure – Simple Nail Designs
    * Soft Angel Nails – Simple Nail Designs For Round Nails
    * Simple Nice Nail Art Designs
    * Can I Have a Design on Only One Finger? – Simple Nail
       Designs
    * The Winter Blues French Nail Manicure